
This article presents the successfully completed Starlink installation for Airplane Hangars in Camarillio, CA by ProSat Networks 1-844-799-0258. ProSat Networks offers professional Starlink installation and IT network solutions for commercial businesses, residential homes, RVs, RV parks, campgrounds, construction sites, farm, airplane hangars, airports, mining facilities and long-range, multi-building indoor and outdoor wireless networks across California.
To book your Starlink installation, call us at 1-844-799-0258 or request a quote through our Contact Us form.
🔹Location: Camarillo, CA
🔹Property Type: Airplane hangar
🔹Property Size: 9600 sqft
🔹Roof Type: Corrugated metal roof
🔹Starlink Kit: Standard kit
🔹Mount Solution: Pivot mount
Our Starlink Installation SMEs received a service request for Starlink installation for airplane hangars. Our team kick-off the installation process by conducting the following tasks:
Our team conducted an initial offsite assessment to identify the feasibility of the hangar facility for Starlink installation. This process involved analyzing satellite imagery, obtaining onsite photographs, and assessing the roof type and any potential obstructions that could affect the installation. This evaluation allowed us to determine the materials, equipment, appropriate mounting solutions and manpower necessary to ensure smooth and hassle-free Starlink installation.
After the initial offsite assessment, we received the customer’s approval for the job order and arranged the installation schedule with our Camarillo CA Starlink installers.
Our professional Starlink installers arrived as scheduled to perform the following scope of work:
🔹Install the Starlink Standard dish using a pivot mount.
🔹Route the cable from Starlink dish to indoor Gen3 WiFi mesh router.
🔹Place the router in the approved location of the customer for optimal coverage throughout the home.
🔹Activate & configure the Starlink Gen3 WiFi mesh router.
🔹Guide the customer on how to use the Starlink App.
🔹Test and document the installations with photos.
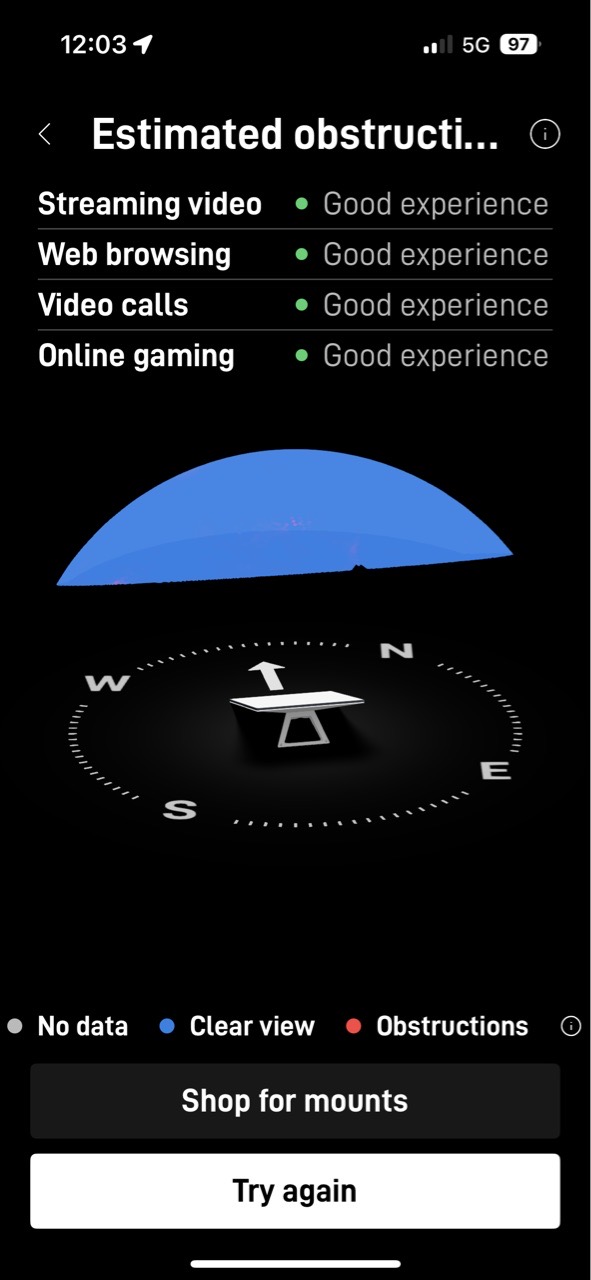
To begin the installation, we conducted a Starlink Obstructions Test using the Starlink App. This essential step helped identify the optimal dish placement, ensuring a strong and reliable connection to the Starlink satellite network. The test resulted in a rating of ” Good Experience,” confirming that the chosen location supports smooth streaming, browsing, video calls, and gaming.
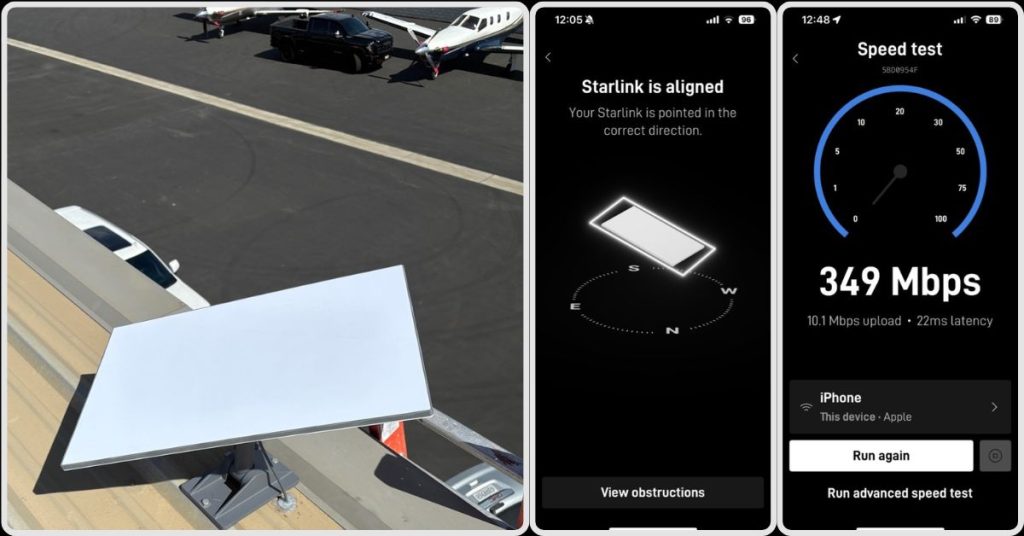
The Starlink Standard dish was securely mounted using a pivot mount for maximum stability and signal reception.

The proprietary Starlink cable was carefully routed from the outdoor dish to the indoor location of the Gen3 WiFi mesh router, which is strategically positioned in a customer-approved location to maximize WiFi coverage and signal strength.
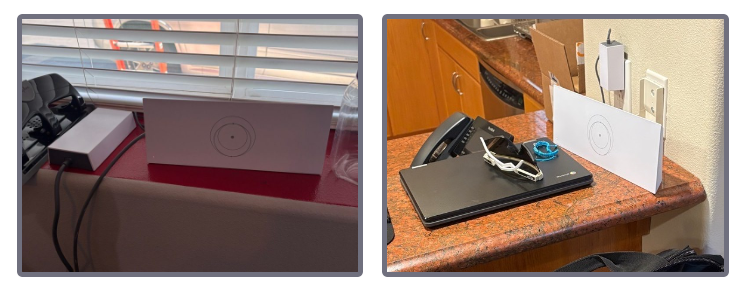
Next, the cable was plugged in to the Gen3 WiFi mesh router. It was powered on, activated and configured for the customer’s preferred network name (SSID) and password.
The customer was provided with a walkthrough on how to use the Starlink App's key features, including:
🔹Managing their SSID
🔹Resetting their WiFi password
🔹Running speed tests
🔹Refreshing or resetting the Starlink network
🔹Troubleshooting common connectivity issues
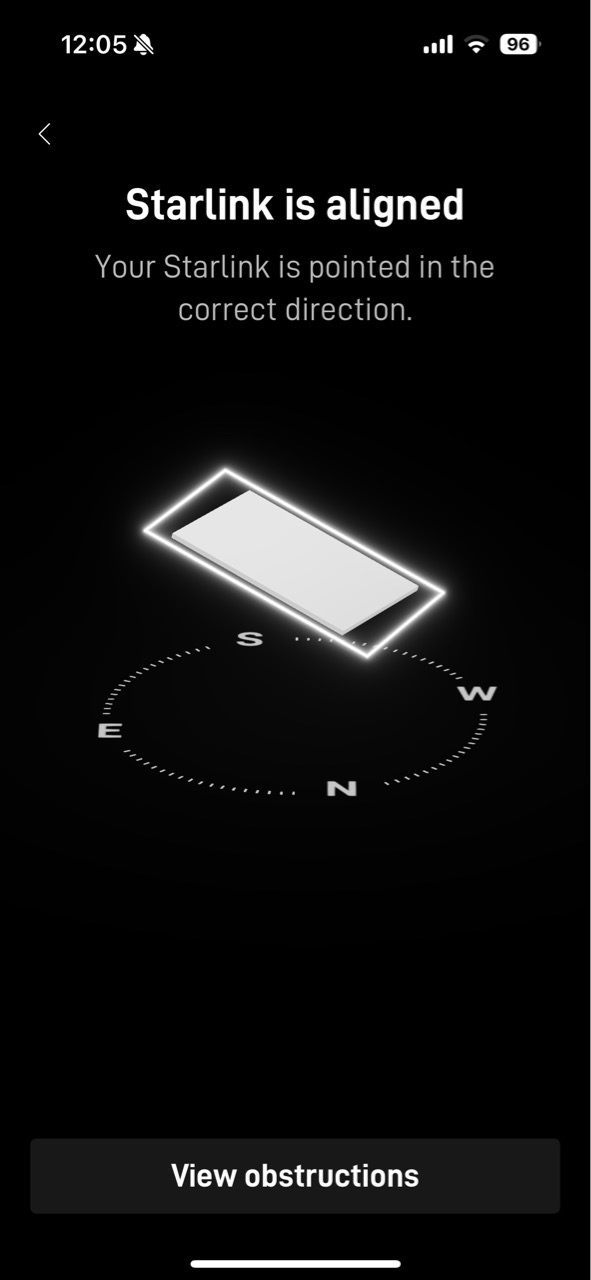
After the installation, our team performed a Starlink Alignment Test to ensure the dish was in the best possible position for continuous satellite connectivity. The process included carefully assessing the dish’s position, considering the elevation angle, azimuth direction, and potential obstructions (e.g., trees, buildings, or other structures).
Then, the Starlink Speed Test was conducted to test the system’s internet performance. It gives the key metrics such as download speed, upload speed and latency.
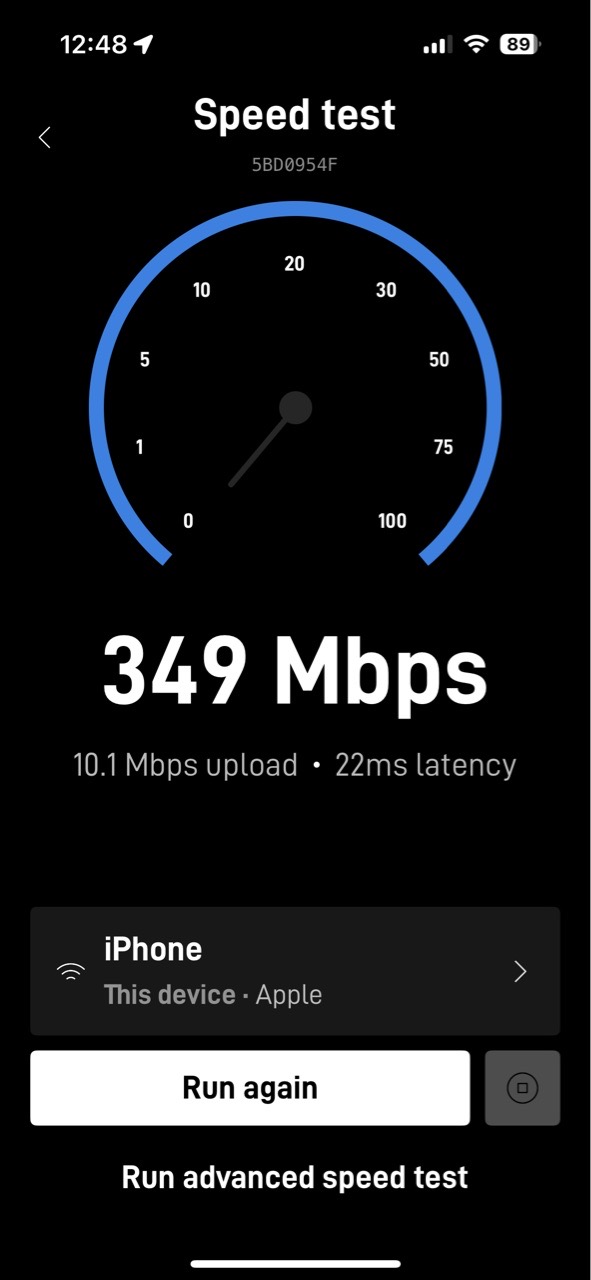
It is important to note that Starlink may take up to 12 hours to fully optimize, scanning the sky to connect with the satellites. Users may experience temporary speed fluctuations or brief dropouts during this process. Once complete, the connection stabilizes, ensuring reliable high-speed internet.
Call us at 1-844-799-0258 to schedule your Starlink installation or to address any service-related inquiries.
Thank you for reading our Starlink installation articles.