
ProSat Networks offers professional Starlink satellite dish installation and IT network services for commercial businesses, residential homes, RV parks and maritime vessels. We provide services to campgrounds, RV parks, marinas, hotels, resorts. construction sites, agricultural operations, airplane hangars, mining facilities and long-range, multi-building indoor and outdoor wireless networks across Arizona. This article highlights a successfully completed Starlink installation in Princeton IL.
👉 Call 1-844-799-0258 for free consults or fill out our Contact Us form.
🔹Location: Princeton, IL
🔹Property Type: Residential home
🔹Size: 1,820 sqft, two-story with a one story addition on the back (North end)
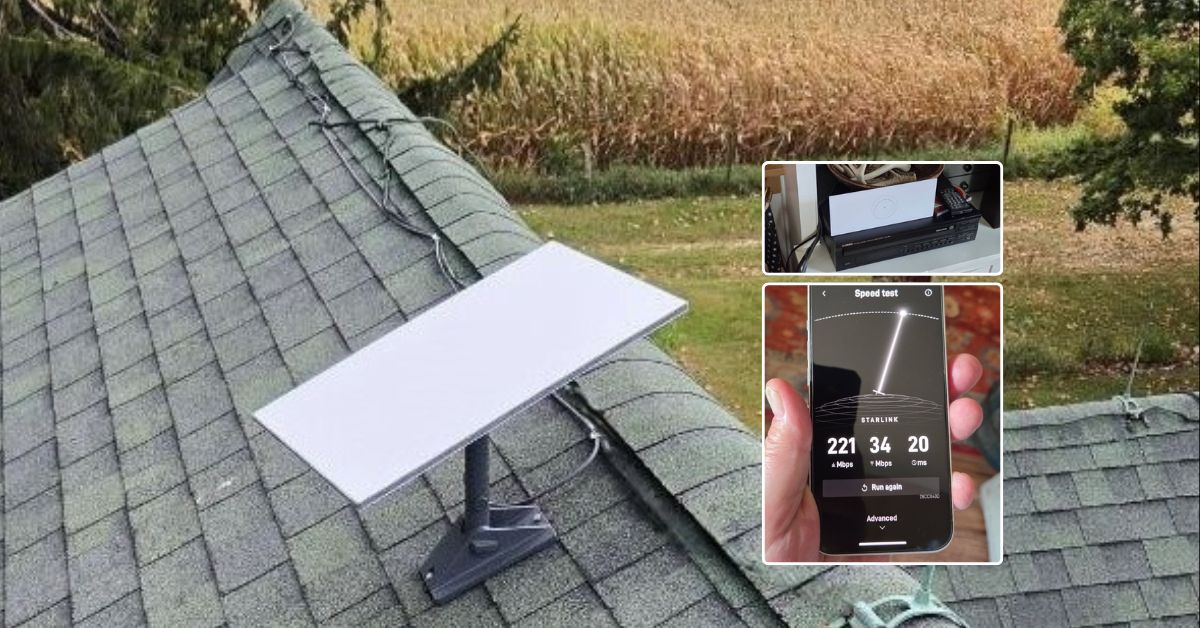
🔹Roof Type: Asphalt Shingles
🔹Starlink Model: Standard Kit
🔹Mounting Equipment: Pivot mount
Our Starlink SMEs received a service request for Starlink installation in Princeton, IL. Our team provided professional service by conducting the following tasks.
An initial offsite assessment is conducted to gather the customer’s requirements for the Starlink installation. This step includes evaluating the structural characteristics of the residential property using satellite imagery and site photos. Potential obstructions, such as trees or nearby buildings, are also reviewed. The offsite assessment enables the team to plan the required equipment, tools, materials, and manpower to complete the installation in a single visit.

The installation plan is developed and sent to the customer for approval. Once approved and the equipment is onsite, the installation schedule is coordinated with our Starlink installers in Princeton, IL.
Our Starlink installers arrived as scheduled and began the installation process with the Starlink obstructions test. By ensuring a clear line of sight to the sky, our team laid the foundation for optimal Starlink connection before proceeding with the dish installation.

The Starlink dish is securely mounted using a pivot mount providing stable elevation and clear line of sight.

At the roof edge, the Starlink cable is neatly tucked beneath the eave line with evenly spaced clips. A wall entry point is created to route the cable to the indoor location of the Gen 3 router.

Inside, the Starlink cable is plugged into the Gen 3 router. The router is powered on to initialize and be activated. The WiFi settings is configured with SSID and password.

The customer is provided a simple walkthrough on how to manage the Starlink system using Starlink App.
Following the successful installation of the Starlink equipment, the team carried out a Starlink Alignment Test to verify the correct alignment of the dish to the satellite network.

WARNING: If an installer does not incorporate this step into your installation process, or tells you that it is not important, call us ASAP to help save you!
Following the confirmation of proper alignment of the Starlink dish, the Starlink installation team conducted a Starlink Speed Test to evaluate the system’s internet performance, measuring key metrics such as download and upload speeds, latency and overall connection stability to ensure optimal functionality.

While Starlink establishes basic internet connectivity within 5-30 minutes, achieving optimal internet speed is a much longer process that can extend 12-24 hours after installation.
Call us today at 1-844-799-0258 for your free consultation or fill out our Contact Us form.
ProSat Networks offers Starlink installation and IT network services in towns and cities across Illinois
DID YOU KNOW?
Thank you for reading our Starlink installation article.
If you have questions or need professional Starlink installation services, feel free to contact us at 1-844-7990258.